
Open-Plan Living: Defining Zones Without Building Walls

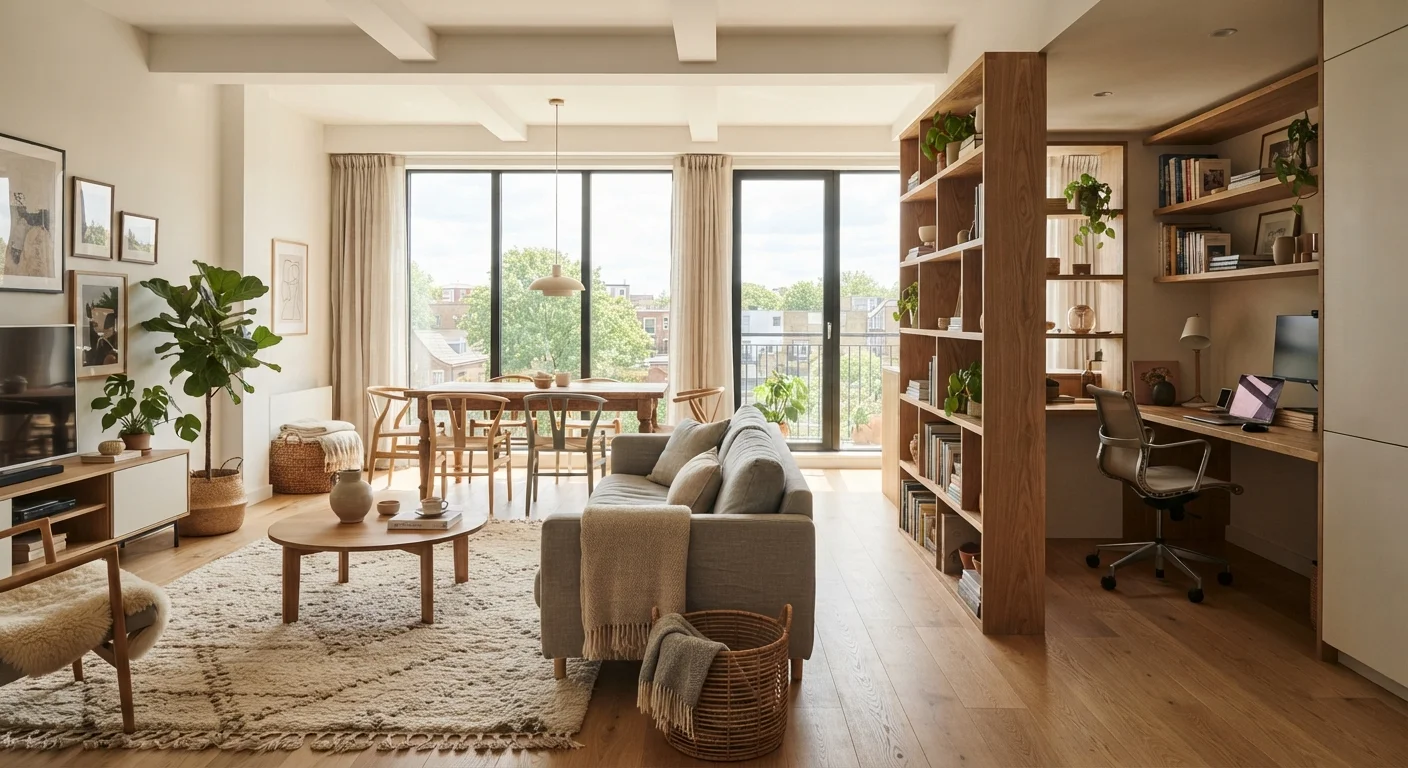
Photo: ScoutAnswers.com | Blogs That Ignite Curiosity editorial
Key Takeaways
- Area rugs are the single most effective tool for anchoring a zone in open-plan spaces.
- Furniture arrangement - especially sofa backs - creates visual boundaries without blocking light.
- Consistent color and material palette ties all zones together and prevents visual chaos.
- Lighting placement signals zone purpose and is as important as furniture placement.
- A home office zone benefits from even a subtle physical separator to support mental focus.
- Traffic flow between zones should remain clear; aim for pathways at least 36 inches wide.
Why Zone Definition Matters in Open Plans
Open-floor-plan homes offer generous light, social flow, and a sense of spaciousness - but without walls to organize daily life, the space can feel shapeless and hard to use well. Rooms blur together, noise travels freely, and the living area often ends up doing double duty for activities that compete with each other.
Defining zones without construction means using furniture, lighting, rugs, and visual cues to communicate purpose and boundary. When done well, each area feels like its own room while the space as a whole remains open and connected. Before diving into steps, it helps to understand the foundational layout principles that apply across every room type - things like traffic flow, focal points, and visual balance.
If you're weighing whether an open plan is right for your home at all, understanding the trade-offs between open and defined rooms is a useful starting point before committing to a layout strategy.
What you will need
How to Define Your Zones Step by Step
The process below works for the most common open-plan combination: a living zone, a dining zone, and a home office or secondary-use zone. Adjust for your specific layout as needed.
Map your activities and count your zones
List every activity that happens in the open space - lounging, dining, working from home, reading, kids' homework. Group related activities together. Most open plans support 2-4 zones; more than that in a single room creates visual noise. Decide which activities genuinely need their own dedicated area versus which can share space.
Use painter's tape to rough out zone footprints on the floor
Tape out the boundaries of each proposed zone directly on the floor. This makes abstract planning concrete. Check that main pathways between zones are at least 36 inches wide - enough for comfortable movement - and that the kitchen or entry isn't blocked. Adjust boundaries until traffic flow feels natural before committing to furniture placement.
Anchor each zone with an area rug
A rug is the most powerful zoning tool available. In the living zone, all front legs of the sofa and chairs should rest on the rug - this ties the seating group into a cohesive unit. In the dining zone, the rug should extend at least 24 inches beyond the table edge on all sides so chairs remain on the rug when pulled out. Choose rugs that share a color family but vary in pattern or texture to keep zones distinct yet related.
Turn the sofa's back toward the dining or adjacent zone
Positioning the sofa so its back faces the dining area rather than floating aimlessly in the room creates a soft wall between zones. This is one of the most effective zone-defining moves available because it uses an existing piece of furniture to do double duty. Pair this with a narrow console table behind the sofa to reinforce the boundary and add a surface for lamps or decorative objects.
Use open shelving or a bookcase as a partial divider for the work zone
A home office zone needs at least a subtle physical separation to function well. A bookcase placed perpendicular to the wall - or even parallel to the sofa back - creates a visual screen without blocking light. Keep the shelving open (not solid) so the space remains airy. Position the desk so it faces the bookcase or a wall rather than directly into the living zone, which reduces distraction and reinforces psychological separation.
Assign dedicated lighting to each zone
Zone-specific lighting does more zoning work than most homeowners expect. A pendant light centered over the dining table visually defines that zone from across the room even when the table isn't in use. A floor lamp beside the sofa signals the reading or living area. A task lamp on the desk marks the work zone. All three can be on at once or individually, giving you control over how much of the room is activated at any given time.
Think in Layers, Not Just Footprints
Keeping the Whole Space Cohesive
Separate zones risk looking like a showroom floor - a collection of unrelated furniture groupings with no visual thread connecting them. Cohesion comes from repeating 2-3 colors or materials across all zones. If the living area has a warm oak coffee table, carry that same wood tone into the dining table legs or the desk surface. If the sofa is in a neutral, echo that neutral in dining chair cushions or a desk lamp shade.
Layered lighting is especially important. Overhead fixtures provide ambient light for the whole space, but each zone should also have its own dedicated light source - a pendant over the dining table, a floor lamp beside the sofa, a task lamp at the desk. This makes each zone feel purposeful and allows you to illuminate one area while leaving others dim.
For the work zone in particular, freestanding bookshelves or storage units offer a flexible way to create a subtle visual screen without the permanence of built-ins. And if your living zone is working with a large seating group, comparing sectionals to separate sofa-and-loveseat combinations can help you pick the layout that best defines the boundary of that zone. See also how to mix furniture styles without visual chaos if you're combining pieces from different periods or aesthetics across zones.
Don't Over-Zone a Small Open Plan
The content on this site is for informational purposes only and is not a substitute for professional advice. Always consult a qualified professional for guidance specific to your situation.